How to write a Windows image to a USB drive
A few friends have asked me almost exactly the same question lately: “How do I write a Windows image to a USB drive?” — and every time I had to explain it over ICQ, Skype or VKontakte… The annoying part is that I never saved what I wrote, so I started again from scratch each time. I have a feeling the question will keep coming up, and not just from friends. Maybe you are wondering the same thing right now ;), so here is a step-by-step guide.
There are actually plenty of ways to get an image onto a flash drive. Plenty of home-made utilities as well, some of them bundling in Trojans as a “bonus” :). You can do it from Linux on the command line, or you can use UltraISO, which is what we will do here. No idea which version will be current by the time you read this, but I used “UltraISO Premium Edition 9.5.2.2836”. Tested on a 16 GB flash drive, and not a fast one.
1) Install UltraISO;
2) Plug the flash drive into a USB port;
2) File – Open – [image_file];
3) Bootable – Write Disk Image (see fig. 1)
4) In the window that opens, find the Disk Drive field and pick your flash drive from the list;
4.1*) The Xpress Boot button lets you work with the boot sectors. There is no point covering it here — everything in there is already at its defaults;
4.2) Write method: USB-HDD+
5) Then we can go ahead and hit the “Write” button.
* This step is optional, feel free to skip it.
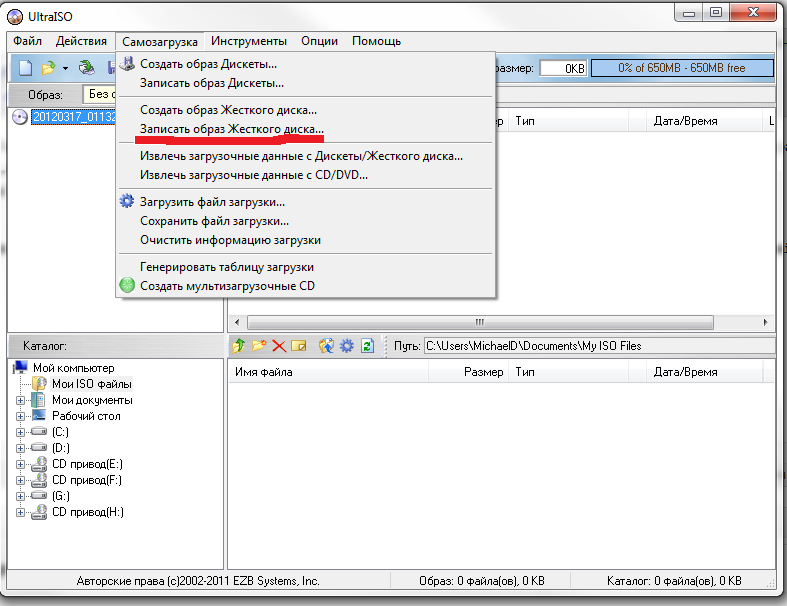
The write took me about 30 minutes, though the flash drive was a very slow one.
And that is all there is to it. I hope you find it useful.
If you have questions, ask away!
