How to submit a job to the GRID
If you have only just started getting to grips with GRID computing, you will run into a lot of questions. The idea behind the GRID seems clear enough, but the moment you dig into the technical detail you find yourself on the edge of a chasm where the knowledge ought to be. GOOGLE turns up plenty on the subject, and more often than not what you land on is somebody’s academic paper or monograph, where everything is laid out very “beautifully” in philosophical terms and the practical value is exactly “0” — when what you wanted from the search was a plain “How to”.
Today I want to answer one of the most common questions — “How do I submit a job to the GRID?” — without the academic detours.
Before I get to what you actually have to do to run a job in the GRID, I want to be clear about how the whole thing works.
As we know, GRID computing is nothing more than running the jobs you submit in a distributed way across remote clusters — geographically remote ones included — that are joined into a single GRID network.
The obvious question then is: “How does all of this work at the software level?” No single article can answer that in full, but I will try to give you the general picture.
Picture the following situation: you are the director of a birdhouse factory :). Business is steady and comfortably mid-sized, around 4,000 birdhouses a month. Then an order arrives from Germany: “We urgently need 40,000 birdhouses in 1 month”. You clearly cannot fill that on your own, so you bring in 10 companies from other cities in the same line of business and have them work on the order in parallel. Before they can start, though, you need to:
– Sign a cooperation agreement;
– Send them the technical specification (drawings, dimensions, notes);
Once everything is agreed and signed off, the companies start work in parallel.
When the birdhouses are finished you get word that the goods are ready to ship. You call the delivery service and collect them from the manufacturers’ warehouses.
The upshot: your company built and shipped 40,000 birdhouses to Germany right on time.

So why the birdhouse factory? Because that example describes exactly how work gets done in the GRID. Let’s see for ourselves, with a practical example. Say you have this problem: “We have a mathematical model of how the Ukrainian economy develops, and ten years of statistics. Work out how a change in the dollar rate between 8.00 and 20.00 UAH will affect small and medium-sized business five years into the future, month by month, assuming the gas price moves between 500 and 1000 dollars. Sub-task: find the dollar rate and gas price at which conditions for business are the most favourable”. Not a bad little problem, is it? And the main thing is that it is real — one of the jobs we actually run at the Institute of Industrial Economics of the National Academy of Sciences of Ukraine in Donetsk. On a single machine it takes an age to compute. A local cluster is no better if you need the numbers in time to make a decision. So we decide to ask the GRID for help. Here is what that takes:
1) You need a GRID participant certificate issued by a registrar;
2) You need to belong to a virtual organisation whose subject area matches your research;
3) You need a server with middleware already installed for working in the GRID (in our case the Institute of Mathematical Machines and Systems Problems in Kyiv gave us access to their own server — many thanks to them for that!);
With all of that in place, we can get on with actually running the job:
Step 1: Log in to the server. In my case, over SSH:
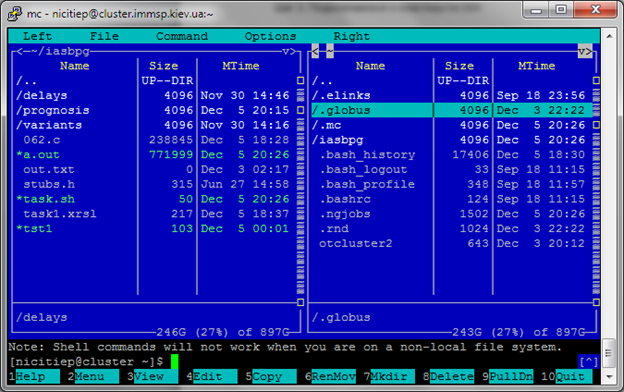
Step 2: To authenticate in the GRID we have to add the certificate the registrar issued us. Create a folder called “.globus” in the user’s home directory.
Put the certificate file and the public key file (.pem) into it.
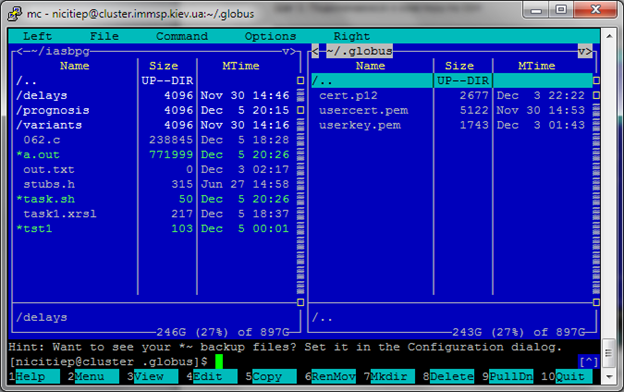
Then run the grid-cert-info command. If the certificates have been set up correctly, it prints the certificate owner’s details on screen.
Step 3: Next, register a proxy certificate. This is the step that opens up access to the GRID.
All it takes is the command: grid-proxy-init
By default the command opens a session lasting 12 hours.
To set your own session length, use the command: grid-proxy-init -valid 27:45, where 27:45 = 27 hours 45 minutes
Step 4: Let’s try running our job on the local cluster first, without the GRID.
The code is written in C and lives in the file 062.c. The statistics database sits in the variants directory, and the database of regulators in the delays directory.
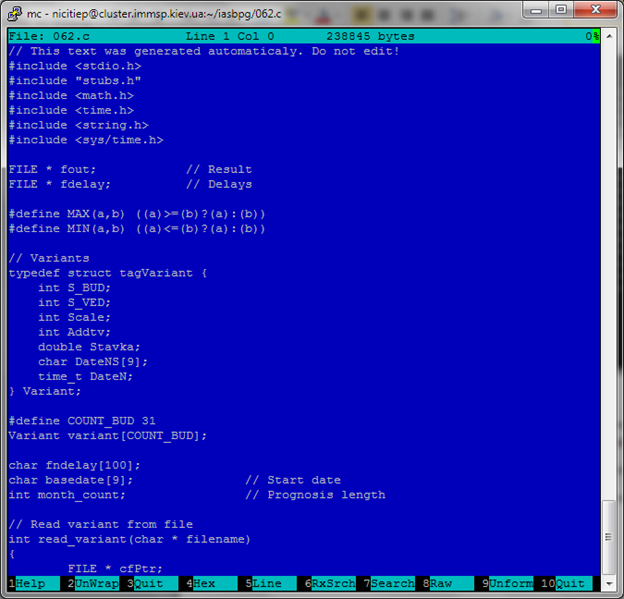
The program reads its input from these files:
./delays/d251
./variants/251
To run the program you first have to compile it: gcc ./062.c –lm –static –m32
That produces the executable file ./a.out
To run it, use the command: ./a.out 251 , where 251 is the parameter that names the input files to use (from the delays and variants folders)
The program writes its result to the file 251 in the /prognosis directory
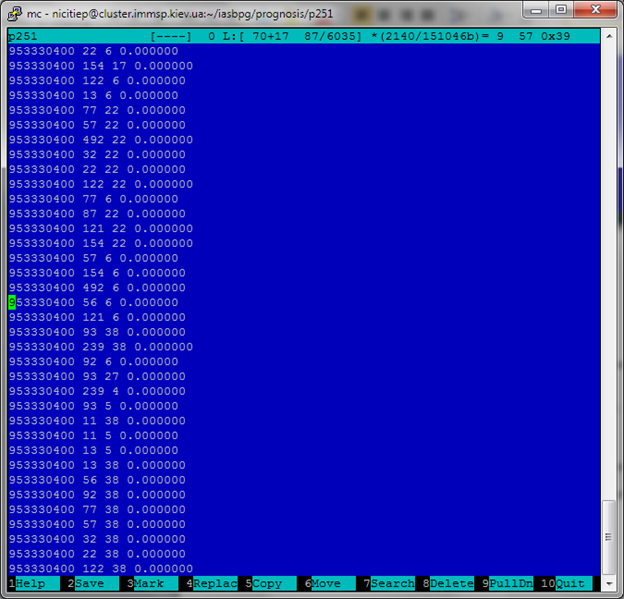
So now we can run the program locally. But we still have a heavy job that has to be computed in parallel on the servers of the GRID network, and that is what the next step is for.
Step 5: To run a job in the GRID you have to describe it in the xRSL language. That description plays the same part as the technical specification in the birdhouse example. Remember? The other factories could not build anything until someone gave them the drawings and the dimensions of the birdhouse. It works the same way here: once the job reaches the GRID, the remote cluster has no idea what to do with it. Sure, there are some files, and they do something important. But in what order should they run? What parameters should they be given? All of that is described in xRSL.
Look at the description language more closely and you will see that you can also set requirements for the cluster. Say you need 4 processor cores, 8 GB of RAM and 500 GB of disk space: you state all of that in the job description, and the job is sent to a cluster that meets those requirements.
The xRSL syntax is covered in the working documentation at www.nordugrid.org
Let’s create the file task1.xrsl:
&(executable="./task.sh")
(inputFiles=(062.c "")
(./delays/d251 "")(./delays/d252 "")(./delays/d253 "")
(./delays/d254 "")(./delays/d255 "")(./delays/d256 "")
(./variants/251 "")(./variants/252 "")(./variants/253 "")
(./variants/254 "")(./variants/255 "")(./variants/256 "")
)
(stderr="ferr.txt")
(outputFiles=(./prognosis/p251 "")(./prognosis/p252 "")(./prognosis/p253 "")
(./prognosis/p254 "")(./prognosis/p255 "")(./prognosis/p256 ""))
(jobname="IASBPG17122011-хх")
(notify="e mymail@gmail.com")
The executable command tells the cluster that this is the file to start once your job lands there, whichever cluster that turns out to be.
The notify command sends you an email once the job has finished.
inputFiles lists every file the program needs in order to run. Any extra libraries or input files have to go in that list as well.
The contents of task.sh are the same as the commands we used to run the program locally:
#!/bin/sh
gcc ./062.c –lm –static –m32
sleep 1
./a.out 251
./a.out 252
./a.out 253
./a.out 254
./a.out 255
./a.out 256
In task.sh we list the commands that will run on the remote GRID cluster.
Our 062.с file has to be compiled on the remote cluster, so that is what we do here.
With task.sh and task1.xrsl written, we can move on to submitting the job to the GRID.
NorduGrid Middleware gives us this command: ngsub –f ./task1.xrsl
The job is then placed on an available cluster. If it goes through, you get a message on screen with the job number, something like:
[nicitiep@cluster iasbpg]$ ngsub -f ./task1.xrsl
Job submitted with jobid: gsiftp://uagrid.org.ua:2811/jobs/7429132311440713023391
You can check how the job is getting on with the ngstat command:
[nicitiep@cluster iasbpg]$ ngstat gsiftp://uagrid.org.ua:2811/jobs/7429132311440713023391
Job gsiftp://uagrid.org.ua:2811/jobs/7429132311440713023391
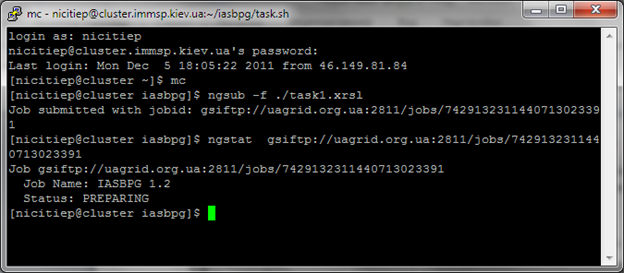
Step 6: Once the job has finished and its status reads FINISH, you have to fetch the results. To do that we use the command ngget:
ngget gsiftp://uagrid.org.ua:2811/jobs/7429132311440713023391
The results are copied into the user’s home directory
To keep an eye on GRID resources, there is a web interface: http://www.nordugrid.org/monitor/
The resource monitor shows the current state of every cluster in Europe. It lets you track job statuses, cluster activity and load, who is on the GRID at the moment, and so on.
And that’s about it. I really hope this has helped you get to grips with the subject.
If you have more questions on this, do ask them under the article or write to me through the contact form.
Good luck!
